Last week I shared with you an African Flower Blanket that I had recently finished and we received lots of wonderful feedback plus plenty of questions about how I join my flowers.

I have added this new tutorial to our blog, hopefully it will help all of our happy hexagon and flower crocheters!
To be able to ‘join as you go’ you need to be working with a motif that has chain spaces in the final round.
This is very easy if you are working with a basic Granny Square but in this case, I was working with an African Flower motif that had a solid border.

A small adjustment to my final round enables me to join my motifs together on the go. You need to complete one flower, including the final border before you can join the next flower.
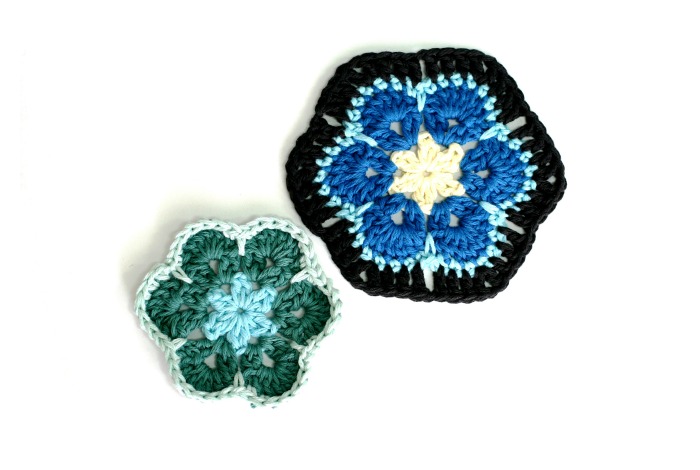
Remember – each petal is made up of three trebles, a “corner” (a treble, chain, treble into the centre stitch) and another three trebles.
Starting on the first stitch of a petal, join your border colour and chain three (counts as your first treble).
Continue across your petal with a treble into each stitch until you have a total of four trebles.
This will take you to the centre of your petal and to the start of your first corner.
Chain one and work a second treble back into the same space as the previous treble.
You have now created your first corner!
 Continue across the other side of your petal with three more trebles.
Chain one to create a gap over the long double crochet from the previous round.
This will be the centre of the flat edge between two corners.
 Continue working your way around the flower, repeating the above pattern until you have six corners.
Slip stitch into the top of your chain three.
You now have one completed hexagon, with a chain space in each corner and one in the centre of each side.
Start your second flower in exactly the same manner and work to your first corner, pausing after your first treble into the centre stitch.
This time, instead of adding a chain space and working your second treble back into the same you will create your first join.
To do this you need to place your two hexagons so that two of the corners line up.

Holding the two hexagons with the two wrong sides together and the corners still lined up, insert your hook through the chain space of the completed hexagon.
Draw the working yarn through the chain space and then through the live stitch on your hook as a slip stitch, joining the two hexagons.


Complete your second treble in the same space, completing your first joined corner.

Continue across the other side of your petal with three more trebles.
Instead of your chain one to create a gap in the middle of the straight side of your hexagon, you will join at the centre point by inserting your hook through the chain space of the completed hexagon and drawing the working yarn through the chain space and then through the live stitch on your hook as a slip stitch.

Repeat on the second corner so that your two hexagons are attached – corner, side, corner.

Complete the rest of the round, adding chain stitches in each corner and the centre of each side.
I like to join my hexagons horizontally first in a row and then build in tiers, row after row.
The following rows will be a little more involved as you will be joining up to four sides of each hexagon as you build the row.

Thanks so much for your tutorial Kelly! I’ve loved the lacier look of your hexi blankets in the shop and now I can make one of my own.